1.3 飞舞的光条
● 实例说明
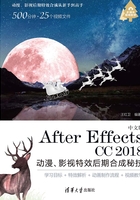
本例主要讲解Particular(粒子)和【发光】特效的应用。完成的动画流程画面如图1.92所示。

图1.92 动画流程画面
● 学习目标
通过本例的制作,学习Particular(粒子)特效的参数设置及使用方法;掌握粒子制作光线的原理。
● 操作步骤
1.3.1 新建“蒙版”合成
 执行菜单栏中的【合成】| 【新建合成】命令,打开【合成设置】对话框,设置【合成名称】为“蒙版”,【宽度】数值为50px,【高度】数值为50px,【帧速率】为25帧/秒,【持续时间】为00:00:04:00秒,如图1.93所示。

图1.93 【合成设置】对话框
 执行菜单栏中的【图层】|【新建】|【纯色】命令,打开【纯色设置】对话框,设置【名称】为“蒙版1”,【宽度】数值为50像素,【高度】数值为50像素,【颜色】为白色,如图1.94所示。

图1.94 【纯色设置】对话框
 选中“蒙版1”层,单击工具栏中的【椭圆工具】
 按钮,在“蒙版”合成窗口中绘制椭圆蒙版,如图1.95所示。

图1.95 绘制椭圆蒙版1
 按T键展开【不透明度】属性,设置【不透明度】数值为30%,效果如图1.96所示。

图1.96 不透明度效果
 选中“蒙版1”层,按Ctrl+D组合键复制出另一个“蒙版1”层,按Enter键重命名为“蒙版2”层,如图1.97所示。

图1.97 复制层
 选中“蒙版2”层,将原有的蒙版删除,单击工具栏中的【椭圆工具】
 按钮,在“蒙版”合成窗口中绘制椭圆蒙版,如图1.98所示,效果如图1.99所示。

图1.98 绘制椭圆蒙版2

图1.99 蒙版效果
 选中“蒙版2”层,按Ctrl+D组合键复制出“蒙版3”层,如图1.100所示。

图1.100 复制层
 选中“蒙版3”层,将原有的蒙版删除,单击工具栏中的【椭圆工具】
 ,在“蒙版”合成窗口中绘制椭圆蒙版,如图1.101所示,效果如图1.102所示。

图1.101 绘制椭圆蒙版3

图1.102 蒙版效果
 选中“蒙版3”层,按Ctrl+D组合键复制出“蒙版4”层,如图1.103所示。

图1.103 复制层
 选中“蒙版4”层,将原有的蒙版删除,单击工具栏中的【圆角矩形工具】
 按钮,在“蒙版”合成窗口中绘制圆角矩形蒙版,如图1.104所示,效果如图1.105所示。

图1.104 绘制圆角矩形蒙版1

图1.105 蒙版效果
 选中“蒙版4”层,按Ctrl+D组合键复制出“蒙版5”层,如图1.106所示。

图1.106 复制层
 选中“蒙版5”层,将原有的蒙版删除,单击工具栏中的【圆角矩形工具】
 按钮,在“蒙版”合成窗口中绘制圆角矩形蒙版,如图1.107所示,效果如图1.108所示。

图1.107 绘制圆角矩形蒙版2

图1.108 蒙版效果
 选中“蒙版5”层,按Ctrl+D组合键复制出“蒙版6”层,如图1.109所示。

图1.109 复制层
 选中“蒙版6”层,将原有的蒙版删除,单击工具栏中的【圆角矩形工具】
 按钮,在“蒙版”合成窗口中绘制圆角矩形蒙版,如图1.110所示,效果如图1.111所示。这样就完成了“蒙版”合成的制作。

图1.110 绘制圆角矩形蒙版3

图1.111 蒙版效果
1.3.2 新建“飞舞的光条”合成
 执行菜单栏中的【合成】|【新建合成】命令,打开【合成设置】对话框,设置【合成名称】为“飞舞的光条”,【宽度】数值为1024px,【高度】数值为576px,【帧速率】为25帧/秒,【持续时间】为00:00:04:00秒,如图1.112所示。

图1.112 【合成设置】对话框
 执行菜单栏中的【图层】|【新建】|【纯色】命令,打开【纯色设置】对话框,设置【名称】为“黑背景”,【宽度】数值为1024像素,【高度】数值为576像素,【颜色】为黑色,如图1.113所示。

图1.113 【纯色设置】对话框
 执行菜单栏中的【图层】|【新建】|【灯光】命令,打开【灯光设置】对话框,设置【名称】为Emitter,单击【确定】按钮。灯光层会自动创建到“飞舞的光条”合成时间面板中,如图1.114所示。

图1.114 新建Emitter层
 选中Emitter层,按P键展开【位置】属性,按住Alt键的同时单击【位置】左侧的码表
 按钮,在“飞舞的光条”时间线面板中输入“wiggle(2,100)”,如图1.115所示。

图1.115 设置表达式
 在【项目】面板中选择“蒙版”合成,将其拖动到“飞舞的光条”合成时间线面板中,如图1.116所示。

图1.116 添加合成
 选中“蒙版”层,单击显示与隐藏
 按钮,将该层隐藏,如图1.117所示。

图1.117 隐藏“蒙版”层
 执行菜单栏中的【图层】|【新建】|【纯色】命令,打开【纯色设置】对话框,设置【名称】为“粒子”,【宽度】数值为1024像素,【高度】数值为576像素,【颜色】为黑色,如图1.118所示。

图1.118 【纯色设置】对话框
 选中“粒子”层,在【效果和预设】面板中展开RG Trapcode特效组,双击Particular(粒子)特效,如图1.119所示。

图1.119 添加Particular(粒子)特效
 在【效果控件】面板中展开Emitter(Master)(发射器)选项组,设置Particles/ sec(粒子数量)为7380,在Emitter Type(发射类型)右侧的下拉列表框中选择Light(s)(灯光发射),Velocity(速度)数值为0,Velocity Random(速度随机)数值为0,Velocity Distribution(速率分布)数值为0,Velocity from Motion(运动速度)数值为0,Emitter Size X(发射器X轴大小)数值为0,Emitter Size Y(发射器Y轴大小)数值为0,Emitter Size Z(发射器Z轴大小)数值为0,Random Seed(随机种子)数值为0,如图1.120所示,效果如图1.121所示。

图1.120 设置Emitter(发射器)选项组参数

图1.121 设置参数后效果
 展开Particle(粒子)选项组,设置Life(生命)数值为1.5,在Particle Type(粒子类型)右侧的下拉列表框中选择Sprite(幽灵);展开Texture(纹理)选项组,在Layer(图层)右侧的下拉列表中选择“2.蒙版”,如图1.122所示,效果如图1.123所示。

图1.122 设置Particle(粒子)选项组参数

图1.123 粒子效果
 为了调节光线颜色,执行菜单栏中的【图层】|【新建】|【调整图层】命令,系统会自动创建到“飞舞的光条”合成时间线面板中,如图1.124所示。

图1.124 创建调整图层
 选中“调整图层1”层,按Enter键重新命名为“调节”层,如图1.125所示。

图1.125 设置关键帧
 选中“调节”层,在【效果和预设】面板中展开【颜色校正】特效组,双击【色相/饱和度】特效,如图1.126所示,效果如图1.127所示。

图1.126 添加【色相/饱和度】特效

图1.127 色相/饱和度效果
 在【效果控件】面板中,选中【彩色化】复选框,设置【着色色相】数值为-120,【着色饱和度】数值为60,如图1.128所示,效果如图1.129所示。

图1.128 设置【色相/饱和度】特效参数

图1.129 设置参数后效果
 选中“调节”层,在【效果和预设】面板中展开【风格化】特效组,双击【发光】特效,如图1.130所示,效果如图1.131所示。

图1.130 添加【发光】特效

图1.131 默认发光效果
 在【效果控件】面板中,设置【发光阈值】数值为48,【发光半径】数值为30,【发光强度】数值为1.3,从【颜色循环】右侧的下拉列表选择【锯齿A>B】,【颜色A】与【颜色B】颜色为蓝色(R:30;G:0;B:252),如图1.132所示,效果如图1.133所示。

图1.132 设置【发光】特效参数

图1.133 设置参数后的发光效果
 执行菜单栏中的【图层】|【新建】|【摄像机】命令,在弹出的对话框中设置【预设】为15毫米,单击【确定】按钮,系统会自动创建到“飞舞的光条”合成时间线面板中,如图1.134所示。

图1.134 创建摄像机
 选择“摄像机1”层,按P键展开【位置】属性,设置【位置】数值为(517,149,-530),如图1.135所示。

图1.135 设置【位置】参数
 执行菜单栏中的【文件】| 【导入】| 【文件】命令,打开【导入文件】对话框,选择下载文件中的“工程文件\第1章\飞舞的光条\背景.jpg”素材,单击【导入】按钮,“背景.jpg”素材将导入到【项目】面板中。
 在【项目】面板中选择“背景”素材,将其拖动到“飞舞的光条”合成时间线面板中,如图1.136所示。

图1.136 添加素材
 选中“背景”层,设置其模式为【屏幕】,如图1.137所示。

图1.137 设置图层模式
 选中Emitter层,单击显示与隐藏
 按钮,将该层隐藏,如图1.138所示。

图1.138 隐藏Emitter层
 这样就完成了“飞舞的光条”合成的制作,按小键盘上的0键即可预览其中的几帧动画效果,如图1.139所示。

图1.139 其中几帧动画效果